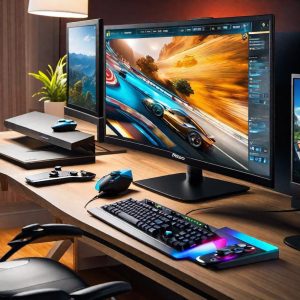
Building your own computer at home is a task that may seem daunting for beginners, but it’s actually quite interesting and rewarding. Building your own PC allows you to create a system that fully meets your needs and budget. In addition, you can better understand how computer components work and how to maintain them. In this article, we’ll look at how to build your own PC step by step, what parts you need, and what you should pay attention to during the process.
Planning and selection of components
The very first step in building a PC is planning and choosing the components. Below are the main computer parts you will need:
- CPU is the “brain” of a computer that performs basic calculations.
- Motherboard is the main board on which all other components are mounted.
- RAM is a memory for storing data while programs are running.
- Graphics card (GPU) – responsible for processing graphics (very important for gaming and working with video).
- Hard disk or SSD – stores your files and the entire operating system.
- Power supply – provides energy to all computer components.
- A case is a “shell” that holds components together.
- Cooling system – can be a fan or liquid cooling to prevent overheating.
Before buying components, determine your budget and needs. If you plan to use your computer for gaming, you’ll need a powerful graphics card and processor. If it’s an office PC, you can choose more budget-friendly solutions. Make sure that all components are compatible with each other, in particular, the processor and motherboard must support each other by socket type.
Gathering the necessary tools
Before you start assembling, prepare the necessary tools. You will need:
- Screwdriver (usually a Phillips head).
- Cable ties for organizing cables.
- Anti-static wristband (to protect components from static electricity).
- Component manuals (especially for the motherboard and case).
For your understanding, this is the minimum set of tools that will allow you to assemble a PC safely and conveniently. And then move on to the next point.
Installing the processor on the motherboard
The first step of physical assembly is to install the processor on the motherboard. Open the processor socket on the motherboard (it is covered with a metal cover or lock). Very carefully, without touching the contacts, place the processor in the socket according to the markings (there are small triangles on the processor and the socket that must coincide). After that, close the lid and snap the lock into place.
Setting the RAM
RAM is also installed on the motherboard. First, locate the RAM slots on the motherboard-they’re usually located next to the processor. Open the slot locks and slide the RAM strips in until you hear a distinctive click. Make sure that the slots are seated evenly and that the locks on both sides are engaged.
Installing the motherboard in the case
The next step is to install the entire motherboard into the computer chassis. Before doing so, install the I/O shield on the back of the case. This is a metal plate with holes for the motherboard ports. Next, attach the motherboard to the chassis using the screws that usually come with the chassis. Be careful not to overtighten the screws to avoid damaging the board.
Install a graphics card (if necessary)
The graphics card should be installed in a dedicated PCI-Express slot on the motherboard. It is usually located below the processor. Open the corresponding holes on the back of the case where the graphics card ports will come out and carefully insert the card into the slot until you hear a click. Secure it with the screws.
Connecting the power supply
The power supply is mounted in the bottom or top of the case (depending on the design). Place the unit in the appropriate location and secure it with screws. Next, connect the main power cables to the motherboard, processor, graphics card (if necessary), and hard disk.
Connecting an SSD or hard disk
The hard disk is installed in special bays in the case. These are usually simple mounting brackets that are secured with screws. After installation, connect the power and data (SATA) cables to them.
Connecting fans and cooling system
To prevent overheating, it is important to install the fans or liquid cooling system correctly. Fans are generally connected to the appropriate connectors on the motherboard or to the power supply.
Final check and launch
After all the components are installed, check that the cables are connected correctly and make sure everything is in place. Now you can connect the monitor, keyboard, mouse, and finally turn on the PC. If everything is installed correctly, the computer will start up. Then you can install the operating system. In general, assembling your own PC is not as difficult as it seems at first glance. The main thing is to be careful, attentive, and choose the right components. By assembling a computer yourself, you will not only save money, but also better understand how the device works.

